
How to Replace Your Laptop DVD Drive for a HDD or SSD
Instructions on how to replace your optical drive with a 2nd hard drive or SSD using a drive caddy (New mode us part number OBHD9-SATA-SATA-BU9)
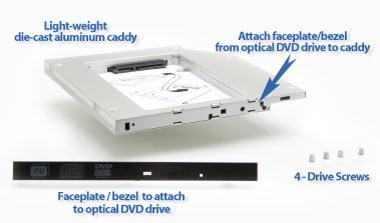
You should have received the following in the box:
Die-cast aluminum caddy
Four (4) drive screws
Optical drive faceplate / bezel
Hard drive / SSD not included. The drive you can use is a 2.5" SATA hard drive or SSD with a maximum height of 9.5mm.
STEP 1
Turn laptop power "On" and press the eject button on the optical drive so the optical drive tray ejects out. Leave the optical drive tray open. Then shut laptop down and turn laptop over so you can access the bottom of the laptop.
STEP2
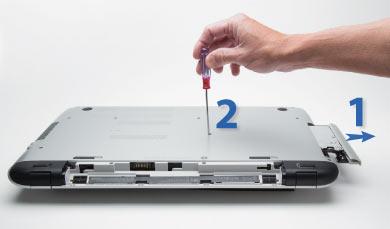
Check your laptop manual to see how to remove the Optical DVD Drive. For most laptops the optical drive is held in by one screw at the bottom of the laptop. Loosen the screw and remove. NOTE: some laptops require you to remove the bottom cover to have access to the screw that holds the optical drive in place. Check your laptop manual.
STEP 3
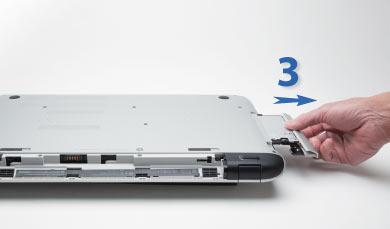
Pull optical drive out
STEP 4
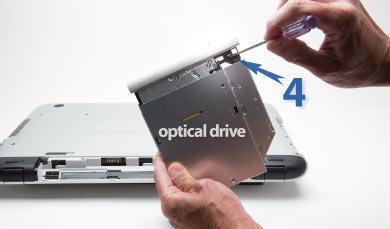
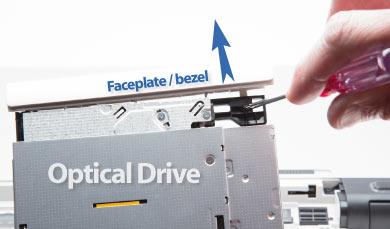
Remove the faceplate / bezel from optical drive with the use of a screwdriver. Start by gently pressing on the "Tab" as shown in the photo. Once the tab on the right releases, you will be able to remove the rest of the faceplate / bezel. Be careful not to break any of the tabs.
STEP 5

Attach the optical drive faceplate / bezel to the drive caddy. The tabs will snap into place and attach to the drive caddy.
STEP 6

Remove the small metal bracket attached at the back of your optical drive and attach it to the drive caddy.
STEP 7
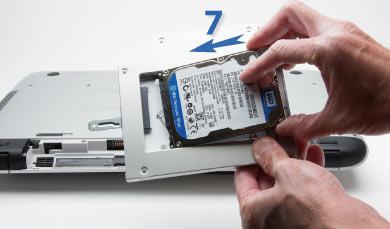
Insert hard drive or SSD into drive caddy. Insert with SATA connector first until the hard drive or SSD slides into place. The SSD or hard drive you can use is any 2.5" SATA drive with a maximum height of 9.5mm.
STEP 8
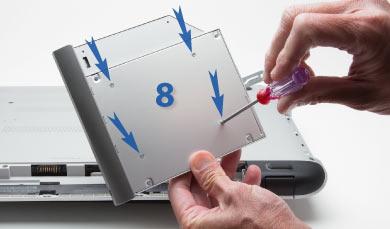
Secure hard drive or SSD to the bottom of the caddy with the four screws provided.
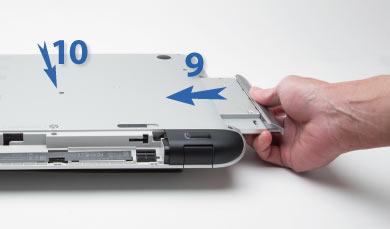
STEP 9
Insert drive caddy into optical drive bay.
STEP 10
Re-attach screw to secure drive caddy to laptop.
Installation Complete!
Re-attach the battery. It’s time to use your laptop.
Trouble shooting Notes
If your 2nd drive is not recognized, here are some things to do: Update your laptop's BIOS to the latest update from the laptop manufacturer's site
If you installed a new drive, you will have to format and partition the drive under Windows Disk Management. Warning! Formatting and partitioning a drive will delete/erase all data.
Optional Step
Attach faceplate/bezel that came with the kit unto your optical drive for use as an external drive with the optional USB cable
Video Instruction
https://www.youtube.com/watch?v=s7Dm6QEeuRU

0 Comments